5 Installing OS (optional)
The device is shipped with an operating system by default. If the OS is corrupted during use or the user needs to replace the OS, it is necessary to re-download the appropriate system image and install it.
The following section describes the specific operations of image download and eMMC flashing.
5.1 Download System image
You can download the ED-AIC3000 system image of the corresponding model according to actual needs. The download path is shown in the following table.
TIP
Currently only Raspberry Pi OS (Desktop) 64-bit system is supported.
| OS | Download Path |
|---|---|
| Raspberry Pi OS (Desktop) 64-bit-bookworm (Debian 12) | https://downloads.raspberrypi.com/raspios_arm64/images/raspios_arm64-2024-11-19/2024-11-19-raspios-bookworm-arm64.img.xz |
5.2 Flash to eMMC
It is recommended to use the official Raspberry Pi flashing tool, and the download path is as follows:
- Raspberry Pi Imager : https://downloads.raspberrypi.org/imager/imager_latest.exe
- SD Card Formatter : https://www.sdcardformatter.com/download/
Preparation:
- A Windows PC has been acquired and the downloading and installation of the official tools to the PC have been completed.
- A USB-C to USB-A flashing cable has been prepared.
- An 8-Pin M12 male to RJ45 network cable has been prepared.
- A 12-pin M12 female to bare wire power I/O cable has been prepared.
- The OS file has been obtained.
- One Linux PC (used to diskify the Raspberry Pi CM5) has been acquired and connected to the network.
TIP
Since the Raspberry Pi's Rpiboot tool does not support the Raspberry Pi CM5 to be disked on Windows operating system for the time being, you need to disk the device on Linux operating system.
Steps:
The steps are described using Windows system as an example.
- Connect the power cord and USB flashing cable (USB-C to USB-A).
- Connect the flashing cable: one end is connected to the USB type-C port on the device side, and the other end is connected to the USB port on the Linux PC.
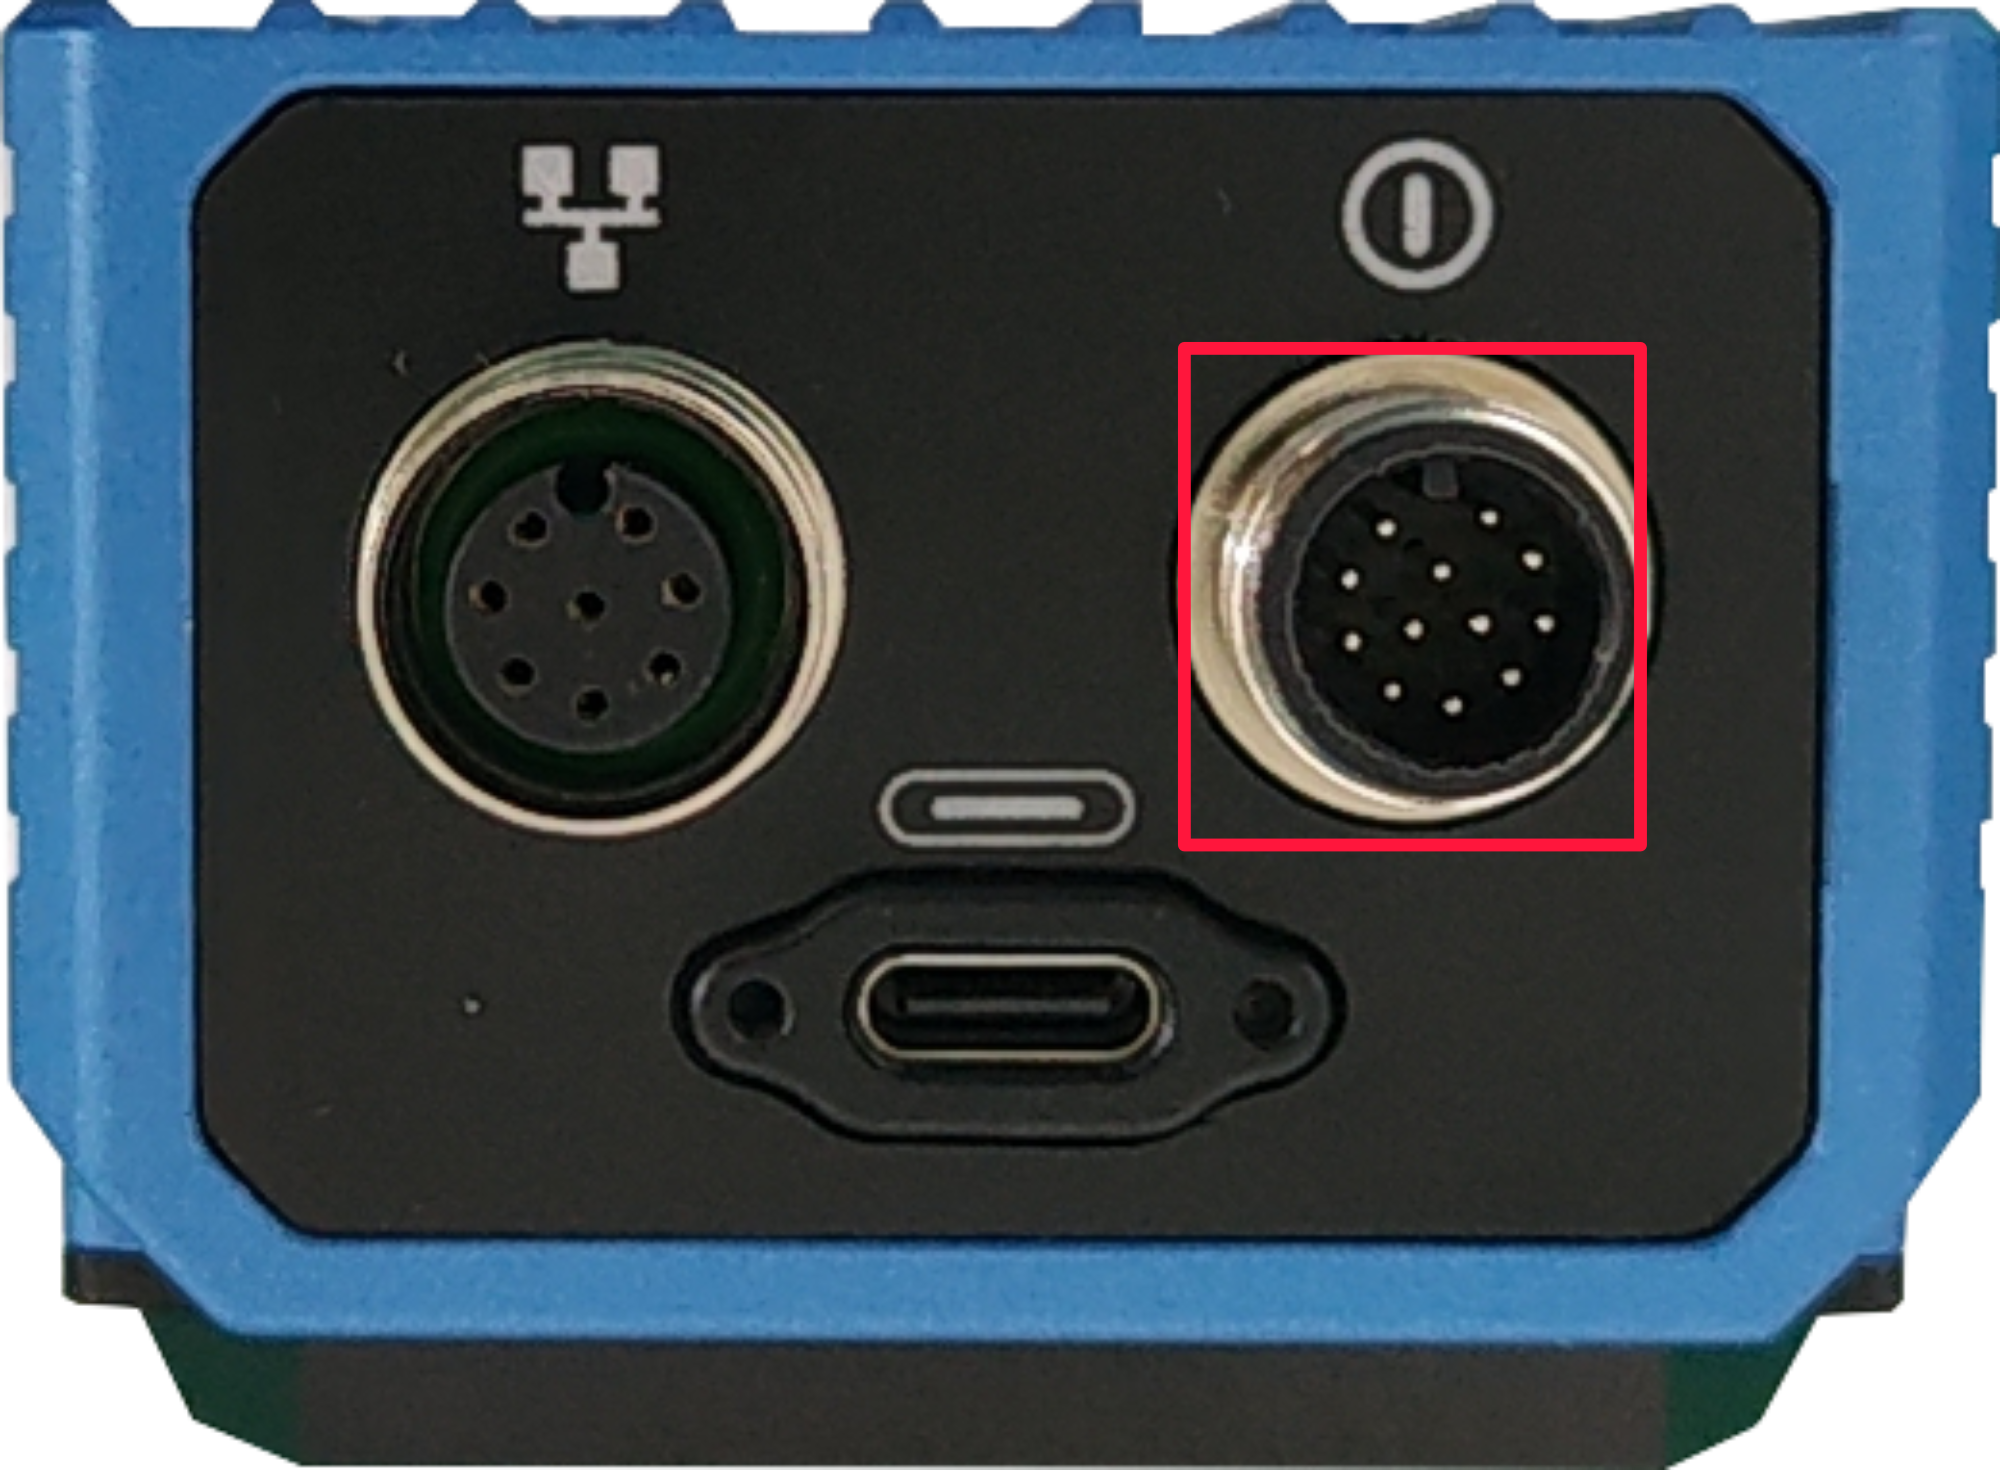
- Connect the power cable: one end is connected to the M12 12-Pin power interface on the device side (the interface in the red box in the figure below), and the other end is connected to the external power supply.
Disconnect the device power supply, then press and hold the TRIG button, and power on the device again. The device will automatically enter the flashing mode.
Disking through a Linux PC is performed as follows.
a. Power up the Linux PC, boot the system, and clone usbboot from github by connecting via ssh or by connecting to a monitor and executing the following commands in sequence in a terminal.
sudo apt update
git clone --recurse-submodules --shallow-submodules --depth=1 https://github.com/raspberrypi/usbboot
b. Execute the following commands to install the build tool build and dependencies.
sudo apt install git libusb-1.0-0-dev pkg-config build-essential -y
c. Execute the following commands in sequence to compile under usbboot.
cd usbboot/
make

d. Execute the following command to the mass-storage-gadget64 directory.
cd mass-storage-gadget64
e. Disconnect power to the device, then press and hold the TRIG button to repower the unit.
f. Execute the following commands in the mass-storage-gadget64 directory to start disk tokenization.
sudo ../rpiboot -d .
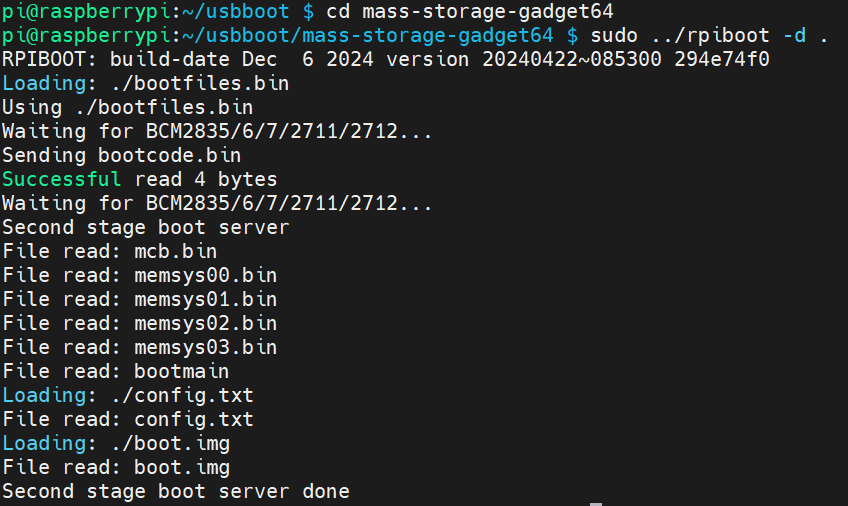
The device does not need to be powered off after the Linux PC disk symbolization is successful, unplug the end of the USB flash cable connected to the Linux PC and plug it into the USB port of the windows PC, the disk symbol will pop up in the lower right corner of the Windows PC.
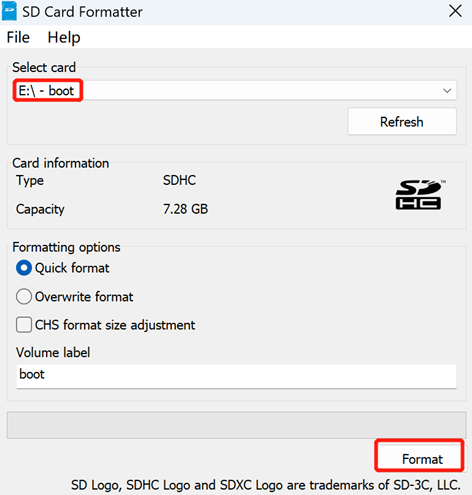
Open SD Card Formatter, select the formatted drive letter, and click "Format" at the lower right to format.
In the pop-up prompt box, select "Yes".
When the formatting is complete, click "OK" in the prompt box.
Close SD Card Formatter.
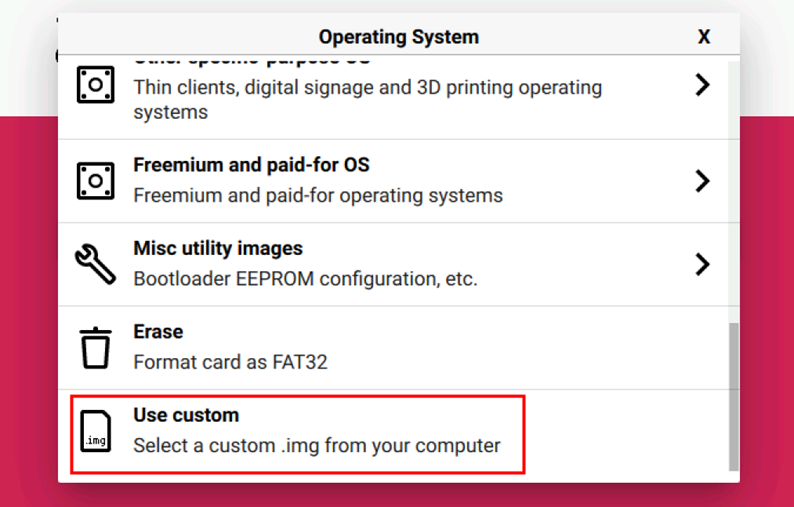
Open Raspberry Pi Imager, select "CHOOSE OS" and select "Use Custom " in the pop-up pane.
According to the prompt, select the OS file under the user-defined path and return to the main page.
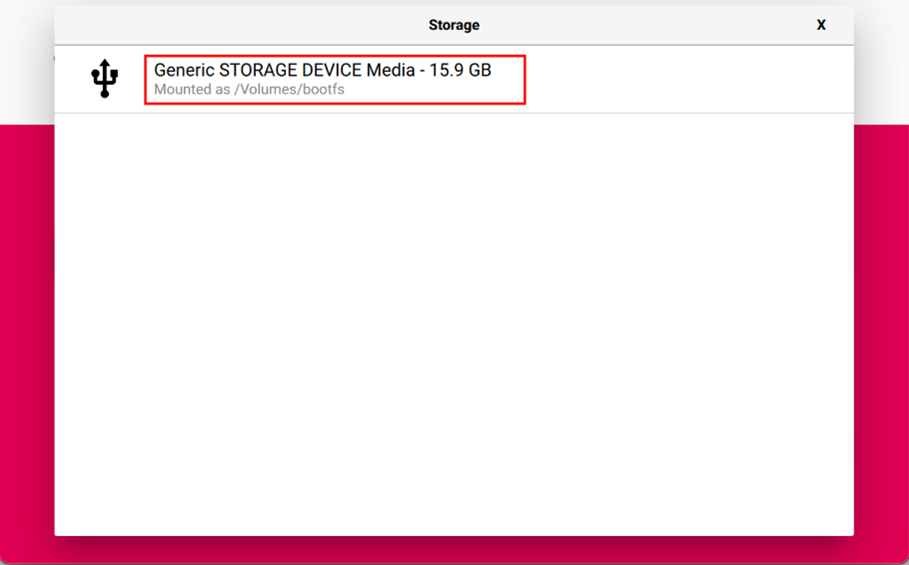
Click "CHOOSE STORAGE", select the default device in the "Storage" interface, and return to the main page.
- Click “NEXT”, select "NO " in the pop-up “Use OS customization?” pane.
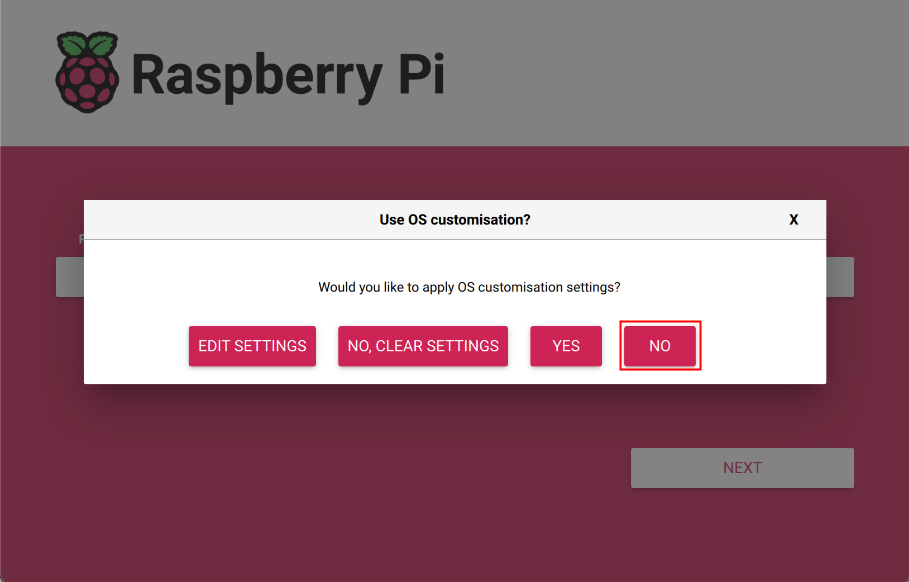
- Select “YES” in the pop-up “Warning” pane to start writing the image.

- After the OS writing is completed, the file will be verified.

After the verification is completed, click “CONTINUE” in the pop-up “Write Successful” box.
Close Raspberry Pi Imager, remove USB cable and power on the device again.
5.3 Installation of firmware packages
After flashing the standard Raspberry Pi OS on the ED-AIC3000 device. You need to configure the system by adding edatec apt source and installing firmware packages to make the system work properly, the following is an example of Debian 12 (bookworm) desktop version.
Prerequisites:
- A Raspberry Pi standard bookworm image has been flashed.
- The device has been booted normally and the relevant boot configuration has been completed.
Operation steps::
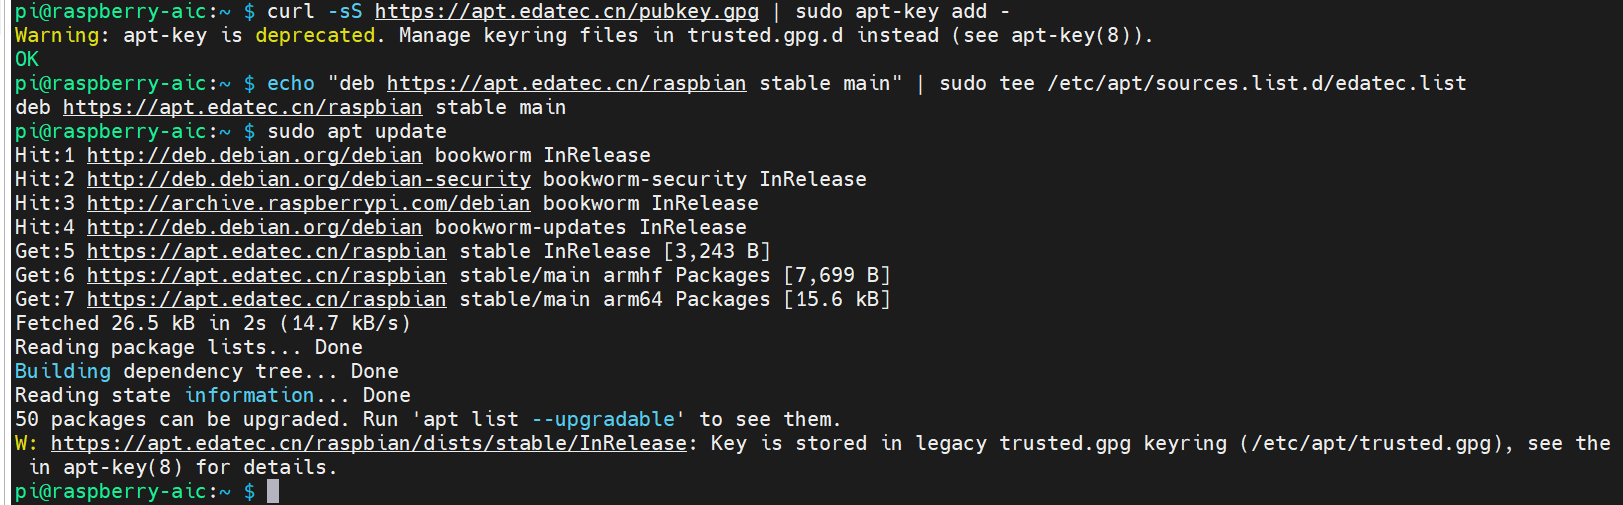
- After the device has booted normally, execute the following commands sequentially in the command pane to add the
edatec aptsource.
curl -sS https://apt.edatec.cn/pubkey.gpg | sudo apt-key add -
echo "deb https://apt.edatec.cn/raspbian stable main" | sudo tee /etc/apt/sources.list.d/edatec.list
sudo apt update
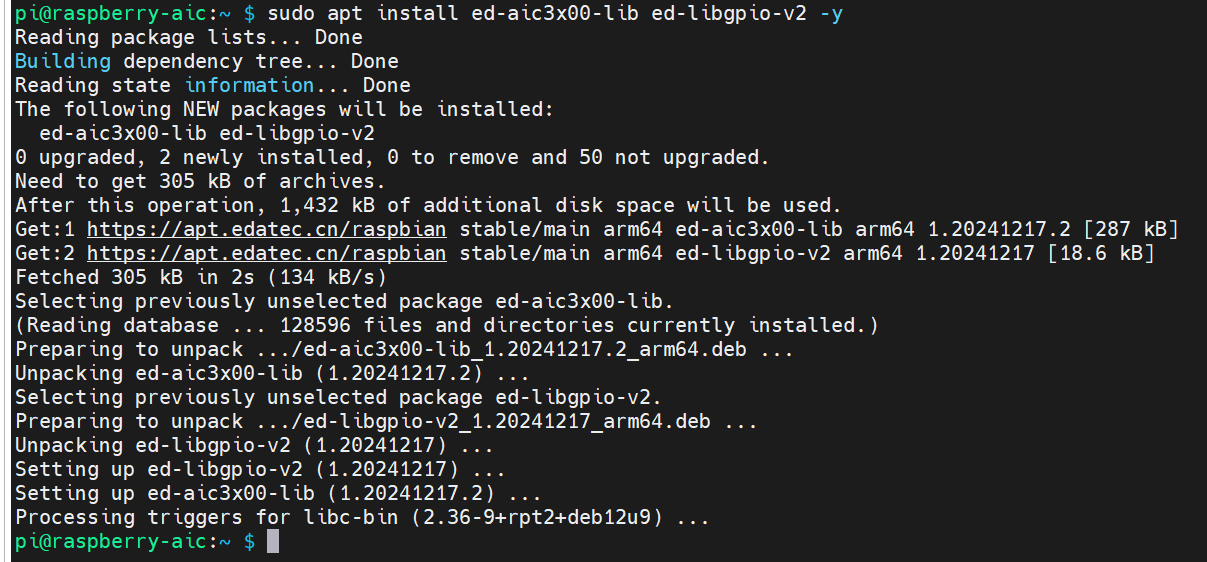
- Execute the following command to download the corresponding firmware package.
sudo apt install ed-aic3x00-lib ed-libgpio-v2 -y
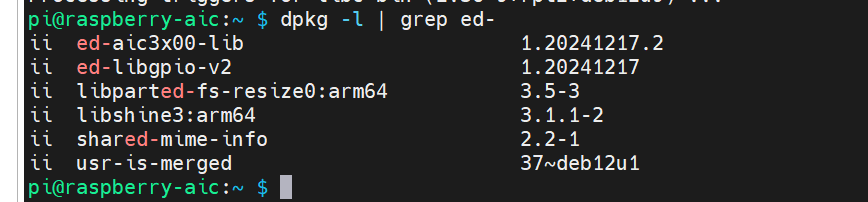
- Execute the following command to check whether the firmware package is installed successfully.
dpkg -l | grep ed-
The result in the following figure indicates that the firmware package has been installed successfully.
- After the installation is complete, execute the following command to reboot the device.
sudo reboot
TIP
If the wrong firmware package is installed, you can remove it by running sudo apt-get --purge remove package, where package is the name of the package.